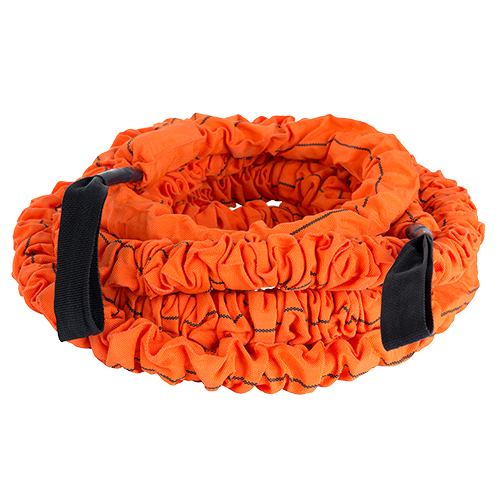
The Beast is the ultimate elastic battle rope. With this guide, we’ll show you how to anchor the Beast effectively, how to utilize training zones, and some simple tips on maintaining your rope for maximum durability. We’ll also get you started with a whole library of movements and exercises to unleash the Beast!
The Beast is 20 feet long and can stretch up to 60 feet during training. The variable resistance factor of resistance band training makes it possible for you to intensify your workout the more you stretch out. It’s why we often refer to it as The Rope that Fights Back.
What makes the Beast a cut above normal battle ropes is not only its versatility, but also its portability and durability. The Beast weighs less than 15 pounds, perfect for taking with you to the gym, so it’s not a hassle trying to lug them around your workout space.
Are there other elastic battle ropes out there? Sure! But competitor ropes aren’t protecting your band like a Slastix resistance band, encasing it in a sleeve to protect it from dust and grime, along with all the nicks, cuts, tears and abrasions it would
With this guide, we’ll show you how to anchor the Beast effectively, how to utilize training zones, and some simple tips on maintaining your rope for maximum durability. We’ll also get you started with a whole library of movements and exercises to unleash the Beast!
To anchor the Beast, no additional equipment, clips or attachments are needed. The Beast anchors to itself by tying down to whatever sturdy base you have available. There are two most common ways to anchor the Beast, and the best for you depends on whether or not you’re working with a partner.
- If you’re working with a static partner, meaning they are not moving during your exercise, have your partner wrap the Beast around their waist and hold it in place to prevent friction on the skin or clothes. Both handles of the rope will go towards you. This anchoring style is easily interchangeable to allow your partner to take a turn right after you.
- If you’re flying solo during your workout, find a sturdy anchor, such as a tree, pole, or fence, or any one of Stroops’s anchoring options. Wrap the rope around the anchor and pull both handles through the loop. Pull it tight so you’ll have equal ropes roughly 10-feet long on both sides. Keep in mind that working out with the Beast involves both a great deal of space and a strong anchor.
- If you’re using the Beast for more functional exercise, such as jumping or sprinting, make sure your rope is firmly anchored. We recommend using a steel clip to hook the beast to your anchor point, or loop the entire rope through the anchor point and tie it down.
With the Beast, it’s important to know where the appropriate area is to exercise, and how far to extend your rope. You don’t want to put more wear on your band than you need, and you certainly don’t want to overdo it and cause harm to yourself or someone else. You can prevent any mishaps and optimize your workout by setting up training and safety zones.
There are three zones to know about: the safety zone, the training zone, and the danger zone. You can mark these zones using Stroops’s Agility Markers, or use any other safe marker you have that won’t put you in danger of tripping, slipping, or falling over.
The safety zone is the area inside of 20 feet (10 feet if you’re using both sides at once) where your rope is not being stretched at all. In this area, you can engage and disengage from your rope, finish your workout, or set up your next one. Set up a marker at the point to where your rope extends without stretching the elastic.
When you stretch out the Beast, you’ll have a 3-1 stretch capacity that will enable you to stretch out to 60 feet (or 30 feet if you’re stretching both ends). Once you’ve stretched your rope to the point where there are no folds or wrinkles in the sleeve, set a marker down a foot or two short of this point. The area between this marker and the one at the end of your safety zone is your training zone.
In the training zone, you’ll have a wide area to perform every exercise you can think of, whether that’s traditional battle rope exercises like waves and slams or functional exercises like sprinting and jumping. Sprinting exercises are best done by starting at the end of the safety zone and sprinting all the way to the end of the training zone.
The area beyond the end marker of your training zone is the danger zone. You should not extend your rope into this area for any reason. Stretching the rope past its max capacity into the danger zone will put you at risk of injury and will rapidly wear out your rope.
If you have exercises that will move you laterally, it’s also a great idea to have markers indicating your training zone out to the sides as well.
