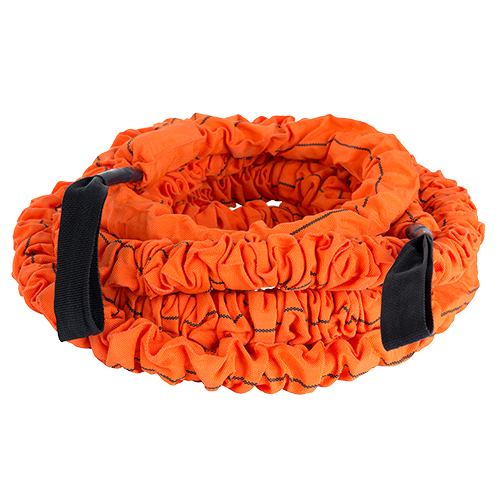
With this guide, learn how to safely and efficiently anchor your Son of the Beast ropes, how to establish smart, effective training zones, and what movements will help get you started in unleashing your strength and power.
The Son of the Beast elastic battle rope is an incredible workout tool that combines your core battle rope movements with explosive, functional movement and resistance-based training to give you the most all-inclusive, full-body workout.
The Son of the Beast Pro Kit equips you with two (2) 10-foot sleeved elastic battle ropes, a Power Pull Belt, two (2) industrial strength steel carabiner clips, two (2) Extra-Large Cloth Anchors, and two (2) Agility Dots to mark off your safety zones (more on that later).
With this guide, learn how to safely and efficiently anchor your Son of the Beast ropes, how to establish smart, effective training zones, and what movements will help get you started in unleashing your strength and power. If you didn’t, or weren’t planning to purchase the full Pro Kit, don’t worry! This guide will give you the tips you need to make the most of your new favorite battle rope in any situation.
To properly anchor the Son of the Beast, there are three main ways to do it. The first is the best if you have the Pro Kit, while the second and third ways work with nothing else but your rope and your anchor point. The first and most important step of any anchoring you do is to ensure that your anchoring location is sturdy and as resistant to movement as possible, such as a pole or a tree. The last thing you want is for your anchoring point to be unable to handle your workout.
Once you’ve decided on your spot, go with whichever of the following anchoring techniques works best for you:
- Once you’ve found your spot, use the XL Cloth Anchor to wrap around the anchor point, then pull the clip through the loop to tie it off. Use one of your steel carabiner clips to attach the Cloth Anchor to the cloth handle on the Son of the Beast. This method works best in situations where you’ll need to create your own anchor point to attach to. Repeat the process with your second rope, anchor, and clip, and you’re ready to go.
- Another anchoring technique works best if you have an area and anchor point designed for battle ropes, such as a Stroops Performance Station or Rack, or another specifically designed battle rope anchor. This means you have two reasonably close anchor points together. In this case, you can either use the Cloth Anchor and steel clip to attach each rope to each point like in the first example, or simply use the steel clips to attach the Son of the Beast ropes directly to the anchor points.
- If you don’t have any other accessories like clips or anchor attachments, the easiest way to anchor your Son of the Beast is to attach your rope directly to the sturdy object by wrapping the rope around it, then pulling it through the loop. We recommend an object that is strong but still narrow enough that wrapping the rope around it will just tie it down by the handle and won’t knot up the actual elastic, causing abnormal wear and tear and shortening your stretch limit.
To use the Son of the Beast most effectively, it’s important to know how to correctly measure the parameters of your workout area, and there’s no better way to do that than by marking off your safety and training zones. Marking these zones can be done with agility products like Agility Markers or any other object, but make sure you are using a marker that neither gets in your way nor can be at risk of slipping if it comes in contact with your foot.
There are three basic zones to mark off to use the Son of the Beast:
- Safety Zone—Since the Son of the Beast is 10 feet long, the area inside of 10 feet is your safety zone. Mark this zone off at the maximum length before your rope has to stretch. The safety zone is where you can safely engage and disengage from the rope, set up for your next exercise, or conclude your workout.
- Training Zone—With your Son of the Beast rope, walk back with the rope in hand from the safety zone, stretching it until the safety sleeve around it is no longer wrinkled around the band. This should be close to or exactly 30 feet away from your anchor point. Mark off this point, and the area between the two markers is your training zone. Inside of this roughly 20-foot area, get the best workout you can with jumps, sprints, rope slams, and more.
- Danger Zone—It’s important to understand that the area past the end marker of your training zone is the “danger zone.” Although the Son of the Beast technically can extend past that marker, it’s not something you want to do. Extending into the danger zone can be damaging to your rope, causing hyper-extension, tears, or breaks, or worse, you could lose control of the band and may cause injury to yourself.
In addition to establishing the length of your zones, you can also cross-measure your training zone area to space out your zone for lateral movement.
