The Body Weight Gym by Stroops is more than just a typical bodyweight training station. With this guide, you’ll learn about how Slastix resistance bands affect bodyweight and suspension training, how to set up your Body Weight Gym, and what exercises will best help to get you started on maximizing your equipment use.


Bodyweight training ignites your core and works with yourself as the resistance factor to give you full-body exercise.
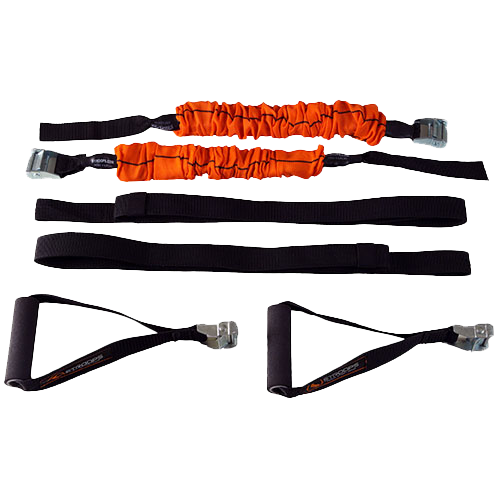
The anchors of the Body Weight Gym are independent of each other, making it easy for you to narrow or widen your anchor point. This diversifies your exercise and eliminates the straps or your limbs from rubbing together.
With this guide, you’ll learn about how Slastix resistance bands affect bodyweight and suspension training, how to set up your Body Weight Gym, and what exercises will best help to get you started on maximizing your equipment.


The Body Weight Gym can be purchased either with or without a pair of 150-pound Slastix resistance band attachments. Without Slastix, you’ll still have a reliable and easily portable suspension training system that you can set up on any high horizontal anchor.
With the Slastix resistance bands, your workout will face an added measure of instability. What this does is keep your core even more engaged in order to keep your body stable and your movements even.
If you’re just getting started or are working to build back through rehabilitation or something similar, the resistance bands can also help you in your workout. It all depends on how you use them. By keeping your exercise slow and steady, you’ll intensify your workout and further strengthen your muscles, particularly in your core. However, if you quicken the pace of your movements, the Slastix becomes a support, using its elasticity to pull you back up from your exercises.
Slastix resistance bands specifically add another element to your workout: safety. The safety sleeve around the band is a big difference in making sure you can do bodyweight training with confidence. An unprotected resistance band simply cannot be trusted for this type of exercise since a snap of the snap will most likely send you falling to the ground. The safety sleeve keeps the broken band encased inside its sturdy fabric, and while that isn’t a situation where continuing your workout is advisable, you’ll be in much better shape without the potential injury caused by an unexpected loss of support.
Setting up the Body Weight Gym is simple and involves only a few pieces and no major hardware needs.
- Locate a high anchor point, preferably one that you can anchor to horizontally, such as a monkey bar or a crossbar.
- Hoist the cloth strap over the anchor, then pull the strap through the loop on the end and tighten it so that it forms a secure grip on the anchor point.
- (If you did not purchase the Slastix resistance band attachment, skip to step 4.) Take the Slastix and attach it by feeding the anchored strap up and under the buckle, then pulling it through to achieve your desired length for exercise. Secure the slack of the strap in place by looping it through the small elastic belt loop on the strap to keep it out of the way.
- Grasp the Slastix and pull downward on it to ensure the strap is secured and attached correctly. If the strap slips out of the buckle upon applied pressure, it’s most likely that you may have attached the strap to the buckle backwards. In this case, pull the strap out and feed it through the other side of the buckle to secure it.
- Take one Textured Grip Handle, and using the same tactic as before, feed the strap of the Slastix (or just the anchor strap if not using Slastix) through the buckle on the handle enough to secure the handle to the strap. Pull on the handle to make sure it is properly secured. If it slips, undo it and feed the strap through the other way.
- Repeat the entire process for your second handle, and you’re done!